صفحه 2 از 3 نخستنخست 123 آخرینآخرین
نمایش نتایج: از شماره 11 تا 20 , از مجموع 30

موضوع: Astrophotography Complete Guide

  1. Top | #1
    کاربر ممتاز

    عنوان کاربر
    کاربر ممتاز
    تاریخ عضویت
    Feb 2011
    شماره عضویت
    584
    نوشته ها
    1,588
    تشکر
    20,144
    تشکر شده 12,837 بار در 1,573 ارسال

          Astrophotography Complete Guide

    Hello My dear Friends,

    Astrophotography is one of the most beautiful & enjoyable activities in Astronomy (most in
    Amateur astronomy) and there are many astronomers who like it & work on it.

    In this topic, we put some good & useful points about this subject from good resources like Sky at night magazine, Cloudy nights & ...

    So be with us & share your comments here


    *With special thanks to
    all those who have contributed their knowledge, hardware tips and softwares in the internet

    *********************************************
    How to take nightscapes
    How to image the moon
    How to image the planets
    Imaging the Sun
    Something about your camera
    Introducing deep-sky photography


    ویرایش توسط stargazer : 04-11-2012 در ساعت 09:56 PM


  2. Top | #11
    کاربر ممتاز

    عنوان کاربر
    کاربر ممتاز
    تاریخ عضویت
    Feb 2011
    شماره عضویت
    584
    نوشته ها
    1,588
    تشکر
    20,144
    تشکر شده 12,837 بار در 1,573 ارسال

    MASTERCLASS

    Make a lunar mosaic to show the Moon at its most majestic

    Most high-resolution images of the Moon’s surface aren’t in fact made from a single image, but a mosaic of several smaller panes. Whether it’s a really detailed close-up of a crater or an enormous mosaic covering the entire lunar disc, chances are it was made by carefully stitching together many smaller overlapping images.Learning how to capture and process a mosaic is a crucial part of lunar astrophotography.

    The majority, if not all, of the best lunar images are taken with either a webcam or a dedicated lunar and planetary CCD camera. You’ll need a laptop with capture software installed for this type of astro imaging, as well as a telescope with a mount that’s capable of accurately tracking the Moon.

    The first step is to take the individual AVI videos. Remember to create a slight overlap between adjacent areas, which will help later with the processing. If you’re making a mosaic of the whole disc, check you’ve covered the entire Moon. You don’t want any gaps!

    Next, process the videos you’ve captured to produce the individual panes for the mosaic. You’ll need to stack them in a program like Registax. Once you have the individual panes you can then stitch them together to create a mosaic.

    امضای ایشان
    برگ در انتهاي زوال مي افتد و ميوه در ابتداي کمال … بنگر که چگونه مي افتي ؟!

  3. 7 کاربر مقابل از stargazer عزیز به خاطر این پست مفید تشکر کرده اند.


  4. Top | #12
    کاربر ممتاز

    عنوان کاربر
    کاربر ممتاز
    تاریخ عضویت
    Feb 2011
    شماره عضویت
    584
    نوشته ها
    1,588
    تشکر
    20,144
    تشکر شده 12,837 بار در 1,573 ارسال

    How to image the planets
    From: Sky at night


    We show you how to capture stunning images of the planets.

    In part three of Astrophotography, The Complete Guide, we show you how to photograph the planets. It's an incredibly rewarding pastime, which can, even today, lead to discovery. Often the announcement of an impact on Jupiter or a storm of Saturn comes from an amateur and is inveriably recorded by a planetary imager.

    to be continued ...
    امضای ایشان
    برگ در انتهاي زوال مي افتد و ميوه در ابتداي کمال … بنگر که چگونه مي افتي ؟!

  5. 6 کاربر مقابل از stargazer عزیز به خاطر این پست مفید تشکر کرده اند.


  6. Top | #13
    کاربر ممتاز

    عنوان کاربر
    کاربر ممتاز
    تاریخ عضویت
    Feb 2011
    شماره عضویت
    584
    نوشته ها
    1,588
    تشکر
    20,144
    تشکر شده 12,837 بار در 1,573 ارسال

    MASTERCLASS

    Photograph Mars with a colour planetary camera

    Mars comes into opposition every 2.1 years. This is when the planet is best for imaging since its orbit puts it opposite the Sun from our point of view, making it appear at its largest and brightest. Things next start to get interesting from the end of 2011. There’s an opposition on 3 March 2012, when the planet will present a 13-arcsecond disc and reach an altitude of close to 50º from the UK.

    Through a telescope there’s plenty to observe on and above the Martian surface. The reddy-brown deserts of Mars are interrupted by dark albedo (shaded) markings that rotate with the planet.

    Mars also has seasons and the effects of these can be seen in the growing and shrinking of the planet’s polar ice caps. There’s weather too, and the appearance ofbright cloudsor dust storms all add to the excitement of imaging this fascinating world. High surface features such as giantvolcanoes affect the Martian atmosphere. Here you may find bright ‘orographic’ clouds forming as the atmosphere is forced above the volcanoes.

    It takes slightly more than an Earth day for Mars to rotate – 24.6 hours – which means that the planet looks very similar from one night to the next, changing more noticeably over the course of several weeks. Detail is subtle and finely structured, so a high-contrast telescope with a large aperture and a long focal length is best for imaging. Large reflectors or catadioptric scopes such as Schmidt-Cassegrain Telescopes (SCTs) are a popular choice for imaging Mars.

    Although a monochrome camera with filters will produce the best images of Mars,a colour camera has the advantage that a one-shot full colour capability helps keep the capture time to a minimum – useful since the planet rotates relatively quickly. There’s also less equipment to set up and you won’t need to spend as long processing colour into the image after you’ve captured it.

    to be continued...
    امضای ایشان
    برگ در انتهاي زوال مي افتد و ميوه در ابتداي کمال … بنگر که چگونه مي افتي ؟!

  7. 6 کاربر مقابل از stargazer عزیز به خاطر این پست مفید تشکر کرده اند.


  8. Top | #14
    کاربر ممتاز

    عنوان کاربر
    کاربر ممتاز
    تاریخ عضویت
    Feb 2011
    شماره عضویت
    584
    نوشته ها
    1,588
    تشکر
    20,144
    تشکر شده 12,837 بار در 1,573 ارسال

    The planet holds up well, even under average seeing conditions, so don’t be afraid to pile on the magnification power by using an optical amplifier like a Barlow lens. Aim to keep your scope’s focal ratio in the region of f/25 to f/45. Following the methods in the ‘Technique’ section, you should end up with an image of the planet in the capture software that shows as a bright and tangible disc. If your camera has a gamma control option, keep this at the default level, adjusting exposure and gain to get the level right.

    An IR-blocking filter is essential for good results and some colour cameras have this built in by default. If yours doesn’t, you can get a separate filter for around £30 that normally screws into the front of the eyepiece adaptor.

    It can be tricky to get the right colour balance with Mars. Before manually adjusting your camera’s colour settings, if you’ve managed to get a large and bright planetary disc in the frame, try using the camera’s auto colour-balance function. If necessary, push the gain up high to get a bright enough signal. This should also alleviate the so-called ‘onion-ring’ effect, which can occur after registration and stacking has been applied. Under certain seeing conditions you may get a ‘false edge’ effect on processed results; however, you’re at the mercy of the sky.

    The capture file will need to be processed with registration and stacking software like RegiStax or AviStack. These pick out the best frames, align them and then stack them together automatically to reduce frame noise.

    In order for this to work well, you do need a good number of frames to start with. High-frame-rate cameras can easily generate several thousand frames during a capture run. A webcam operating at a more sedate 10fps over a typical three-minute run will net 1,800 frames which, although towards the low end, should be enough to produce an acceptable result.

    When passing the capture file through stacking software, expect the number of frames that make up the final stacked image to be just 10-20 per cent of the full frame count. If the final result shows colour fringing, it can be corrected by re-aligning the colour channels either in a graphics editing program or using the RGB colour-align function that some programs have.

    to be continued ...
    امضای ایشان
    برگ در انتهاي زوال مي افتد و ميوه در ابتداي کمال … بنگر که چگونه مي افتي ؟!

  9. 4 کاربر مقابل از stargazer عزیز به خاطر این پست مفید تشکر کرده اند.


  10. Top | #15
    کاربر ممتاز

    عنوان کاربر
    کاربر ممتاز
    تاریخ عضویت
    Feb 2011
    شماره عضویت
    584
    نوشته ها
    1,588
    تشکر
    20,144
    تشکر شده 12,837 بار در 1,573 ارسال

    Sharpen your images of Mars with Registax

    1. Reference Frame

    RegiStax analyses your capture file to assess how sharp and well defined each frame is. Load your capture file (typically an AVI movie file) using the ‘Select’ option and then adjust the lower slider so that a particularly sharp frame is displayed. This will be the reference against which the others are compared.

    2. Placing the Alignment Box

    An alignment box should be placed over a region of high contrast in the reference frame. Typically this will be the main planet’s disc, so choose an appropriate ‘Align box’ size to do this, but don’t worry if some of the disc falls outside the box. Move the cursor over the image and left click to place the box.

    3. Align

    Check the ‘Use pre-blurring’ option and then click on the ‘Align’ button. RegiStax runs through each frame, comparing it to the reference frame. The end result is a graph (‘RegiStrationgraph’ as it’s called). A red line shows the image quality and a green one shows the movement shift between frames.

    4. Limit

    There’s a quality bar in the graph, which can be moved using the slider at the bottom of the main window. Dragging the bar right adds more frames to the final stack and improves noise but also brings more poor quality images into the process. Drag it to the point where the red line indicates 80-90 per cent quality.

    5. Limit and Process

    With your decision on the placement of the quality bar made, click ‘Limit’. This tells RegiStax to ignore any frames to the right of the bar. Follow this with a click on ‘Optimize & Stack’, which will instruct RegiStax to align all of the images to each other and then combine them in a stack to reduce noise.

    6. Wavelets

    The Wavelet’s control sliders allow you to sharpen different levels of detail in the processed image. Click on each slider’s ‘Preview’ button to reveal the type of detail that will be affected by adjusting the slider. Choose the level that you find works on detail rather than noise and move the slider to the right.
    امضای ایشان
    برگ در انتهاي زوال مي افتد و ميوه در ابتداي کمال … بنگر که چگونه مي افتي ؟!

  11. 2 کاربر مقابل از stargazer عزیز به خاطر این پست مفید تشکر کرده اند.


  12. Top | #16
    کاربر ممتاز

    عنوان کاربر
    کاربر ممتاز
    تاریخ عضویت
    Feb 2011
    شماره عضویت
    584
    نوشته ها
    1,588
    تشکر
    20,144
    تشکر شده 12,837 بار در 1,573 ارسال

    Imaging the Sun

    From: Sky at night


    Taking an image of the Sun can reveal fine detail on the surface of our local star


    Taking an image of the Sun is a fascinating astronomical pursuit that gives you the opportunity to study a star close-up. There are other advantages to solar imaging: it can only be done during the day when the temperature is normally quite pleasant and, with plenty of light around, you can say goodbye to fumbling around with red-light torches. Of course, there’s a real danger from the intensity of light – it’s one of the only times that astronomy can pose a risk of physical injury. In this course, we’ll look at how to image the Sun safely.

    to be continued...
    امضای ایشان
    برگ در انتهاي زوال مي افتد و ميوه در ابتداي کمال … بنگر که چگونه مي افتي ؟!

  13. 2 کاربر مقابل از stargazer عزیز به خاطر این پست مفید تشکر کرده اند.


  14. Top | #17
    کاربر ممتاز

    عنوان کاربر
    کاربر ممتاز
    تاریخ عضویت
    Feb 2011
    شماره عضویت
    584
    نوشته ها
    1,588
    تشکر
    20,144
    تشکر شده 12,837 بار در 1,573 ارسال

    MASTERCLASS

    Imaging the Sun with a white-light filter

    Imaging the Sun in its natural ‘white’ light is an inexpensive way to get into solar photography. When you pay attention to the safety issues, it can be a very rewarding way to monitor our nearest star.

    One of the most basic methods is to use solar projection. For this you’ll need a small refractor, ideally mounted on a driven equatorial mount. With your scope pointing away from the Sun, fit a non-plastic, low-power eyepiece and ensure the finder is removed or capped.

    Watching the scope’s shadow on the ground, turn it to point directly at the Sun. A piece of stiff white card held behind the eyepiece will catch the Sun’s image, while a tweak on the focuser will bring it into sharp relief.

    A card shield taped to the objective end of the tube may help improve contrast if the projection is difficult to see.

    Now set your camera to automatic and take a shot of the image on the card screen. If the image comes out too bright, try moving the screen away from the eyepiece or, if you have manual controls, try under-exposing the shot.

    This basic method is capable of showing the photosphere, limb-darkening, sunspots and faculae – it is, however, only suitable for refractors.

    A more sophisticated method, also limited for use with refractors, is to use a device called a Herschel Wedge inserted in the eyepiece holder.

    The wedge basically blocks most of the harmful heat and light from the Sun, reducing its intensity to safe viewing levels.

    A more universal method that is suitable on any type of telescope is to use a white-light filter such as Baader AstroSolar Film or Thousand Oaks Solar Filter.

    AstroSolar Film is available in A4 sheets. It costs around £15-£20 and comes in one of two types: one with a neutral density of 5.0 for visual work or a slightly brighter neutral density of 3.8 for imaging.

    Larger 100x50cm sheets are also available. See the step-by-step below for instructions on fitting a solar filter for imaging.

    With a filter fitted you can image the Sun just as you would the Moon. In fact, the same constraints apply because the Sun’s light is just as susceptible to our turbulent atmosphere.

    Stills cameras such as DSLRs are good for low-power shots, but webcams or preferably high frame-rate planetary cameras are more suited for close-ups.

    For optimal results, however, screwing a solar continuum or green imaging filter onto your camera’s eyepiece may enhance contrast in sunspot detail and solar granulation.

    to be continued...
    امضای ایشان
    برگ در انتهاي زوال مي افتد و ميوه در ابتداي کمال … بنگر که چگونه مي افتي ؟!

  15. کاربر مقابل از stargazer عزیز به خاطر این پست مفید تشکر کرده است:


  16. Top | #18
    کاربر ممتاز

    عنوان کاربر
    کاربر ممتاز
    تاریخ عضویت
    Feb 2011
    شماره عضویت
    584
    نوشته ها
    1,588
    تشکر
    20,144
    تشکر شده 12,837 بار در 1,573 ارسال

    STEP BY STEP

    How to set up and capture solar images

    1. Fitting the filter

    With the scope pointing away from the Sun, remove its lens cap and fit the solar filter; remove or cap the finderscope too. Make sure everything is securely fastened. If required, use a bit of low-tack electrical tape to hold the main filter in place securely. This is especially important on a windy day.

    2. Line up with the Sun

    Lining the telescope up with the Sun without the use of a finderscope isn’t as hard as it sounds. Without looking along the tube towards the Sun, roughly align the scope and then look at its shadow. As the scope approaches the correct alignment, so the tube shadow will reach minimum size.

    3. Keep it in the dark

    If you find it hard to see detail on your laptop’s screen in sunlight, you’ll need a dark enclosure. A simple one can be made by putting a blanket over your head and the computer, but for something more sturdy, try placing the laptop in a closed cardboard box with a slit cut in it to see the screen.

    4. Insert your camera

    If you have one, screw a solar continuum or green imaging filter onto your camera’s nosepiece. Insert the camera into the eyepiece holder of your scope and fine-tune the scope’s position so that an image can be seen on your computer’s screen. Locate the Sun’s edge and focus roughly.

    5. Settings and focus

    Using the highest frame-rate, reduce gain and then exposure until the image is correctly exposed and contains no white. If you can’t, you may need to use a neutral density filter. Rotate the camera so that any spots visibly move horizontally across the frame while slewing in RA. Finally, fine-focus the image.

    6. Capture

    For low image scale (magnification) setups showing all, or at least a large portion, of the Sun’s photosphere, aim to capture 500-800 frames. Increase this up to around 2,000 frames for larger image scales. If your camera offers it, reduce its gamma slightly to make granulation and spot detail easier to pick out.

    to be continued...
    امضای ایشان
    برگ در انتهاي زوال مي افتد و ميوه در ابتداي کمال … بنگر که چگونه مي افتي ؟!

  17. 2 کاربر مقابل از stargazer عزیز به خاطر این پست مفید تشکر کرده اند.


  18. Top | #19
    کاربر ممتاز

    عنوان کاربر
    کاربر ممتاز
    تاریخ عضویت
    Feb 2011
    شماره عضویت
    584
    نوشته ها
    1,588
    تشکر
    20,144
    تشکر شده 12,837 بار در 1,573 ارسال

    TECH TALK

    Finding your focus

    Focusing is a critical skill to master in any form of astronomical imaging; without it, you’ll get poor results.

    If you’re just starting out, accurate focusing can be quite hard to get to grips with, which can make the whole imaging experience rather frustrating. There’s no real reason why this needs to be the case, so here are a few tips on how to get your images as sharp as possible.

    First, make sure your camera is securely locked into your telescope’s eyepiece holder and that the focuser tension adjustment is set firm.

    You want to be able to move the camera back and forth quite easily, but you also want it to stay where you’ve put it. Locate a high-contrast part of the Sun.

    For white-light imaging, the best target is the Sun’s edge. For more exotic filters, the Sun’s surface is normally sufficiently detailed for you to lock onto that.

    Even here, though, it’s good practice to choose a sunspot group or perhaps a dark hydrogen-alpha filament to give you a better focus target.

    With a gentle grip on the focuser, move in towards focus; getting slower as you appear to be reaching the critical point.

    When you do reach this point, keep going, coming out of focus again on the other side. Then, reverse direction again, passing slowly through focus, this time from the other side.

    Do this a few times until you’re confident that you can recognise the real focus position; then adjust the focuser until you’re in that position.
    امضای ایشان
    برگ در انتهاي زوال مي افتد و ميوه در ابتداي کمال … بنگر که چگونه مي افتي ؟!

  19. 3 کاربر مقابل از stargazer عزیز به خاطر این پست مفید تشکر کرده اند.


  20. Top | #20
    کاربر ممتاز

    عنوان کاربر
    کاربر ممتاز
    تاریخ عضویت
    Nov 2011
    شماره عضویت
    2166
    نوشته ها
    632
    تشکر
    8,638
    تشکر شده 7,688 بار در 659 ارسال

    Astrophotography Complete Guide         
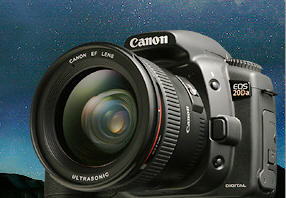
    SOME THING ABOUT YOUR CAMERA
    First lets go over some quick facts and terms about digital cameras.


    Shutter Speeds, Aperture, ISO

    Except for the moon, the stuff we want to shoot in the night sky is pretty faint. That means we need to record as much light as we can. Cameras control the amount of light taken in a picture by two basic ways. There is a shutter that opens and lets light hit the digital sensor in the camera, and there is a variable-sized hole, called the aperture or diaphragm, in the camera lens. If we leave the shutter open longer, we record more light. If we use a larger hole, we let more light in. Nothing complicated here.

    Shutter speeds run in fractions of a second, usually around 1/1,000th of a second at the shortest exposure to many seconds at the longest. Most DSLRs also have a setting called "bulb" that keeps the shutter open as long as you press the shutter button down.

    Aperture settings run in a crazy series of numbers like f/2.8, f/4, f/5.6, and f/8. Confusingly, the smaller the number, the larger the hole in the diaphragm. So, f/4 is a bigger hole than f/8.

    ..... to be continued
    ویرایش توسط stargazer : 03-27-2012 در ساعت 11:06 PM

  21. 2 کاربر مقابل از رخساره روشنی عزیز به خاطر این پست مفید تشکر کرده اند.


صفحه 2 از 3 نخستنخست 123 آخرینآخرین

اطلاعات موضوع

کاربرانی که در حال مشاهده این موضوع هستند

در حال حاضر 1 کاربر در حال مشاهده این موضوع است. (0 کاربران و 1 مهمان ها)

موضوعات مشابه

  1. General Observing Guide
    توسط Fowad در انجمن Astronomical discussions
    پاسخ ها: 20
    آخرين نوشته: 03-17-2012, 01:46 PM

کلمات کلیدی این موضوع

مجوز های ارسال و ویرایش

  • شما نمیتوانید موضوع جدیدی ارسال کنید
  • شما امکان ارسال پاسخ را ندارید
  • شما نمیتوانید فایل پیوست کنید.
  • شما نمیتوانید پست های خود را ویرایش کنید
  •  
© تمامی حقوق برای آوا استار محفوظ بوده و هرگونه کپی برداري از محتوای انجمن پيگرد قانونی دارد